Regular inspections and promptly addressing issues like cracks, stains, or plaster damage can minimize repair costs. It’s also important to ensure that your home has adequate ventilation to reduce the impact of humidity on drywall or plaster.
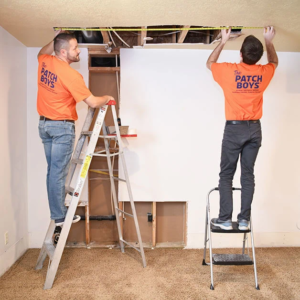
Sagging or bowing ceilings could indicate serious structural problems, such as rotting joists that need to be repaired. Contact Ceiling Repairs Perth now!
Cracks in ceilings can be a sign of serious structural problems. While many cracks are simply cosmetic and don’t indicate any structural damage, others must be dealt with right away. The correct repair solution depends on the size of the crack, its location and what caused it. For example, if the crack is in the area where the wall meets the ceiling, it’s likely a result of foundation settlement and should be looked at by a professional.
Similarly, ceiling cracks that are accompanied by sagging can be a sign of a larger problem. These types of cracks typically indicate that the attic joists or trusses are under stress and may be starting to break down. This can lead to a collapsed ceiling if not addressed quickly.
The most important thing to remember when repairing cracks in the ceiling is to take safety precautions. Any DIYer should wear a dust mask and eye protection when working overhead to protect themselves from the fine particles created by sanding drywall compound. It’s also essential to use a ladder that is sturdy and secure. Lastly, always make sure to read the product instructions before beginning any DIY project.
When repairing cracks in the ceiling, it’s important to clean out the area and make sure that any loose debris is removed. Next, you’ll want to apply a coat of quick-setting joint compound to the affected area and allow it to dry before moving on to the next step.
Once the joint compound is completely dry, it’s time to sand down any high spots and smooth out the patched area. It’s a good idea to use a wide sanding sponge so that you can cover a large surface area with one pass. Finally, you can paint over the area to restore the look of your ceiling.
Even though cracks are common in most homes, it’s important to take them seriously and get them repaired as soon as possible. Ignoring them can cause more serious issues down the road that will be costly and difficult to fix. By taking the necessary steps now, you can ensure your home or business is safe and sound for years to come.
Water Damage
When your ceiling is affected by water damage, you must act quickly to get it repaired. If left unchecked, the water can cause more serious structural problems, including sagging or cracking, and it can lead to mold or mildew growth that degrades the value of your property. Water damage also creates the perfect breeding ground for harmful bacteria, so it is especially important to make sure that any affected rooms are fully inspected by professionals.
Water damage to a ceiling can happen due to a number of issues, including rainwater leaks, expired roof shingles, and leaking pipes. It is also common for water damage to occur in areas that are directly above bathrooms or kitchens, as well as in rooms with poor insulation or a high humidity level.
The first step to fixing a leaking ceiling is to find the source of the water leakage. This may require opening up ceiling panels and using a dehumidifier to dry out the area. Once the source of the leak is found and stopped, it is time to start repairing the ceiling itself. The first thing to do is remove any drywall that has been saturated with water. You should then clean the area and dry it thoroughly, using fans or a dehumidifier as needed.
Once the area is dried, a drywall patch can be applied over the hole, and any new paint or drywall materials can then be added as necessary. It is also recommended that the area be repainted once it is completely dry to prevent any future discoloration from mold or mildew.
The Fantastic Handyman service provides a full ceiling repair and painting service, so we can take care of all your needs in one go. We can replaster and repaint all areas of your ceiling that have been damaged by water, as well as repair any existing walls that need to be repaired. We will also make sure that the area is completely dry before finishing the job, to ensure that any remaining signs of water damage do not return. If you are concerned about the condition of your ceiling, call us today to arrange a free inspection and estimate.
Stains
Seeing water stains on your ceiling is not only an eyesore, but also a sign of underlying water damage. Whether caused by plumbing leaks or a roof problem, it’s important to address them right away to prevent further damage and costly repairs down the road. While it may seem tempting to simply paint over the stains, this will only buy you a little time before the stain reappears and doesn’t actually fix the cause of the issue.
Water stains on the ceiling are often caused by hidden leaks in the roof or pipes, so finding the source of the problem is key. Once the source of the leak is located and repaired, the stain will disappear naturally and your home will be safer.
If you decide to attempt the repair yourself, start by laying a drop cloth on the floor beneath the damaged area and propping up a ladder so you can work safely. Don’t forget to put on your safety gear, including protective gloves and goggles. Once you’re ready to begin, turn off the electricity and water in the area of your home where you plan to work.
Prepping the Damaged Area
Once you’ve prepared your ladder, use a utility knife to score around the perimeter of the damaged drywall, creating a shallow cut. This will help you avoid accidentally stripping the paper face of undamaged drywall when you’re working on the repair. Next, you can scrape off any loose bits of drywall and texture from the ceiling using a putty knife. After removing the damaged drywall, vacuum up any extra dust or debris and wipe down the ceiling with a damp sponge to remove any residual dirt and mildew.
Once the damaged drywall is repaired and primed, you can repaint the area to match the color of the rest of the ceiling. Make sure to choose a paint that’s compatible with your existing ceiling paint and apply multiple coats to ensure full coverage. Once the paint is dry, it’s a good idea to reapply the texture as well. This will help to ensure that the patched areas blend seamlessly with the rest of the ceiling and keep it looking new.
Mold
Mold in a ceiling is an extremely dangerous situation and must be dealt with as soon as possible. The spores produced by mold can trigger serious respiratory conditions and worsen existing ones in vulnerable individuals, especially young children and elderly people. Even if the mold isn’t causing any physical symptoms, it should be treated as an immediate health threat and removed immediately by a trained professional.
The first sign of a mold problem on the ceiling is generally a musty smell. A musty odor often indicates that the ceiling is damp, which will usually result in mold growth. This is typically caused by a water leak that has gone unnoticed and the water soaking into materials that have pores, such as drywall and wood framing.
If the stains on the ceiling are a dark color, they may be indicative of mold, which isn’t something that should be ignored. This is particularly important if the area is infrequently used, as the mold spores can spread throughout the home and pose a significant health risk. A fungicide can be applied to the affected areas to kill any remaining spores and the area can then be dried using natural ventilation, dehumidification equipment or by opening windows. The homeowner should then check the ceiling regularly in the coming weeks to ensure that any spores have not returned.
On the other hand, if the stains are lighter in color and don’t show signs of moisture, it may be an indication that the damp patches are condensation rather than a leak from the roof above. Moisture is the primary culprit in promoting mold growth, so it’s important to address any damp or wet issues promptly. Regularly monitoring the space with a hygrometer and removing items that can collect humidity, such as clothing, can help to prevent future problems.
Assuming the cause of the mold is addressed and the area is properly cleaned, a homeowner can apply a coat of paint to the ceiling to hide any stains or discoloration. In the future, opting for a mold-resistant paint can also assist in keeping the space in good condition.